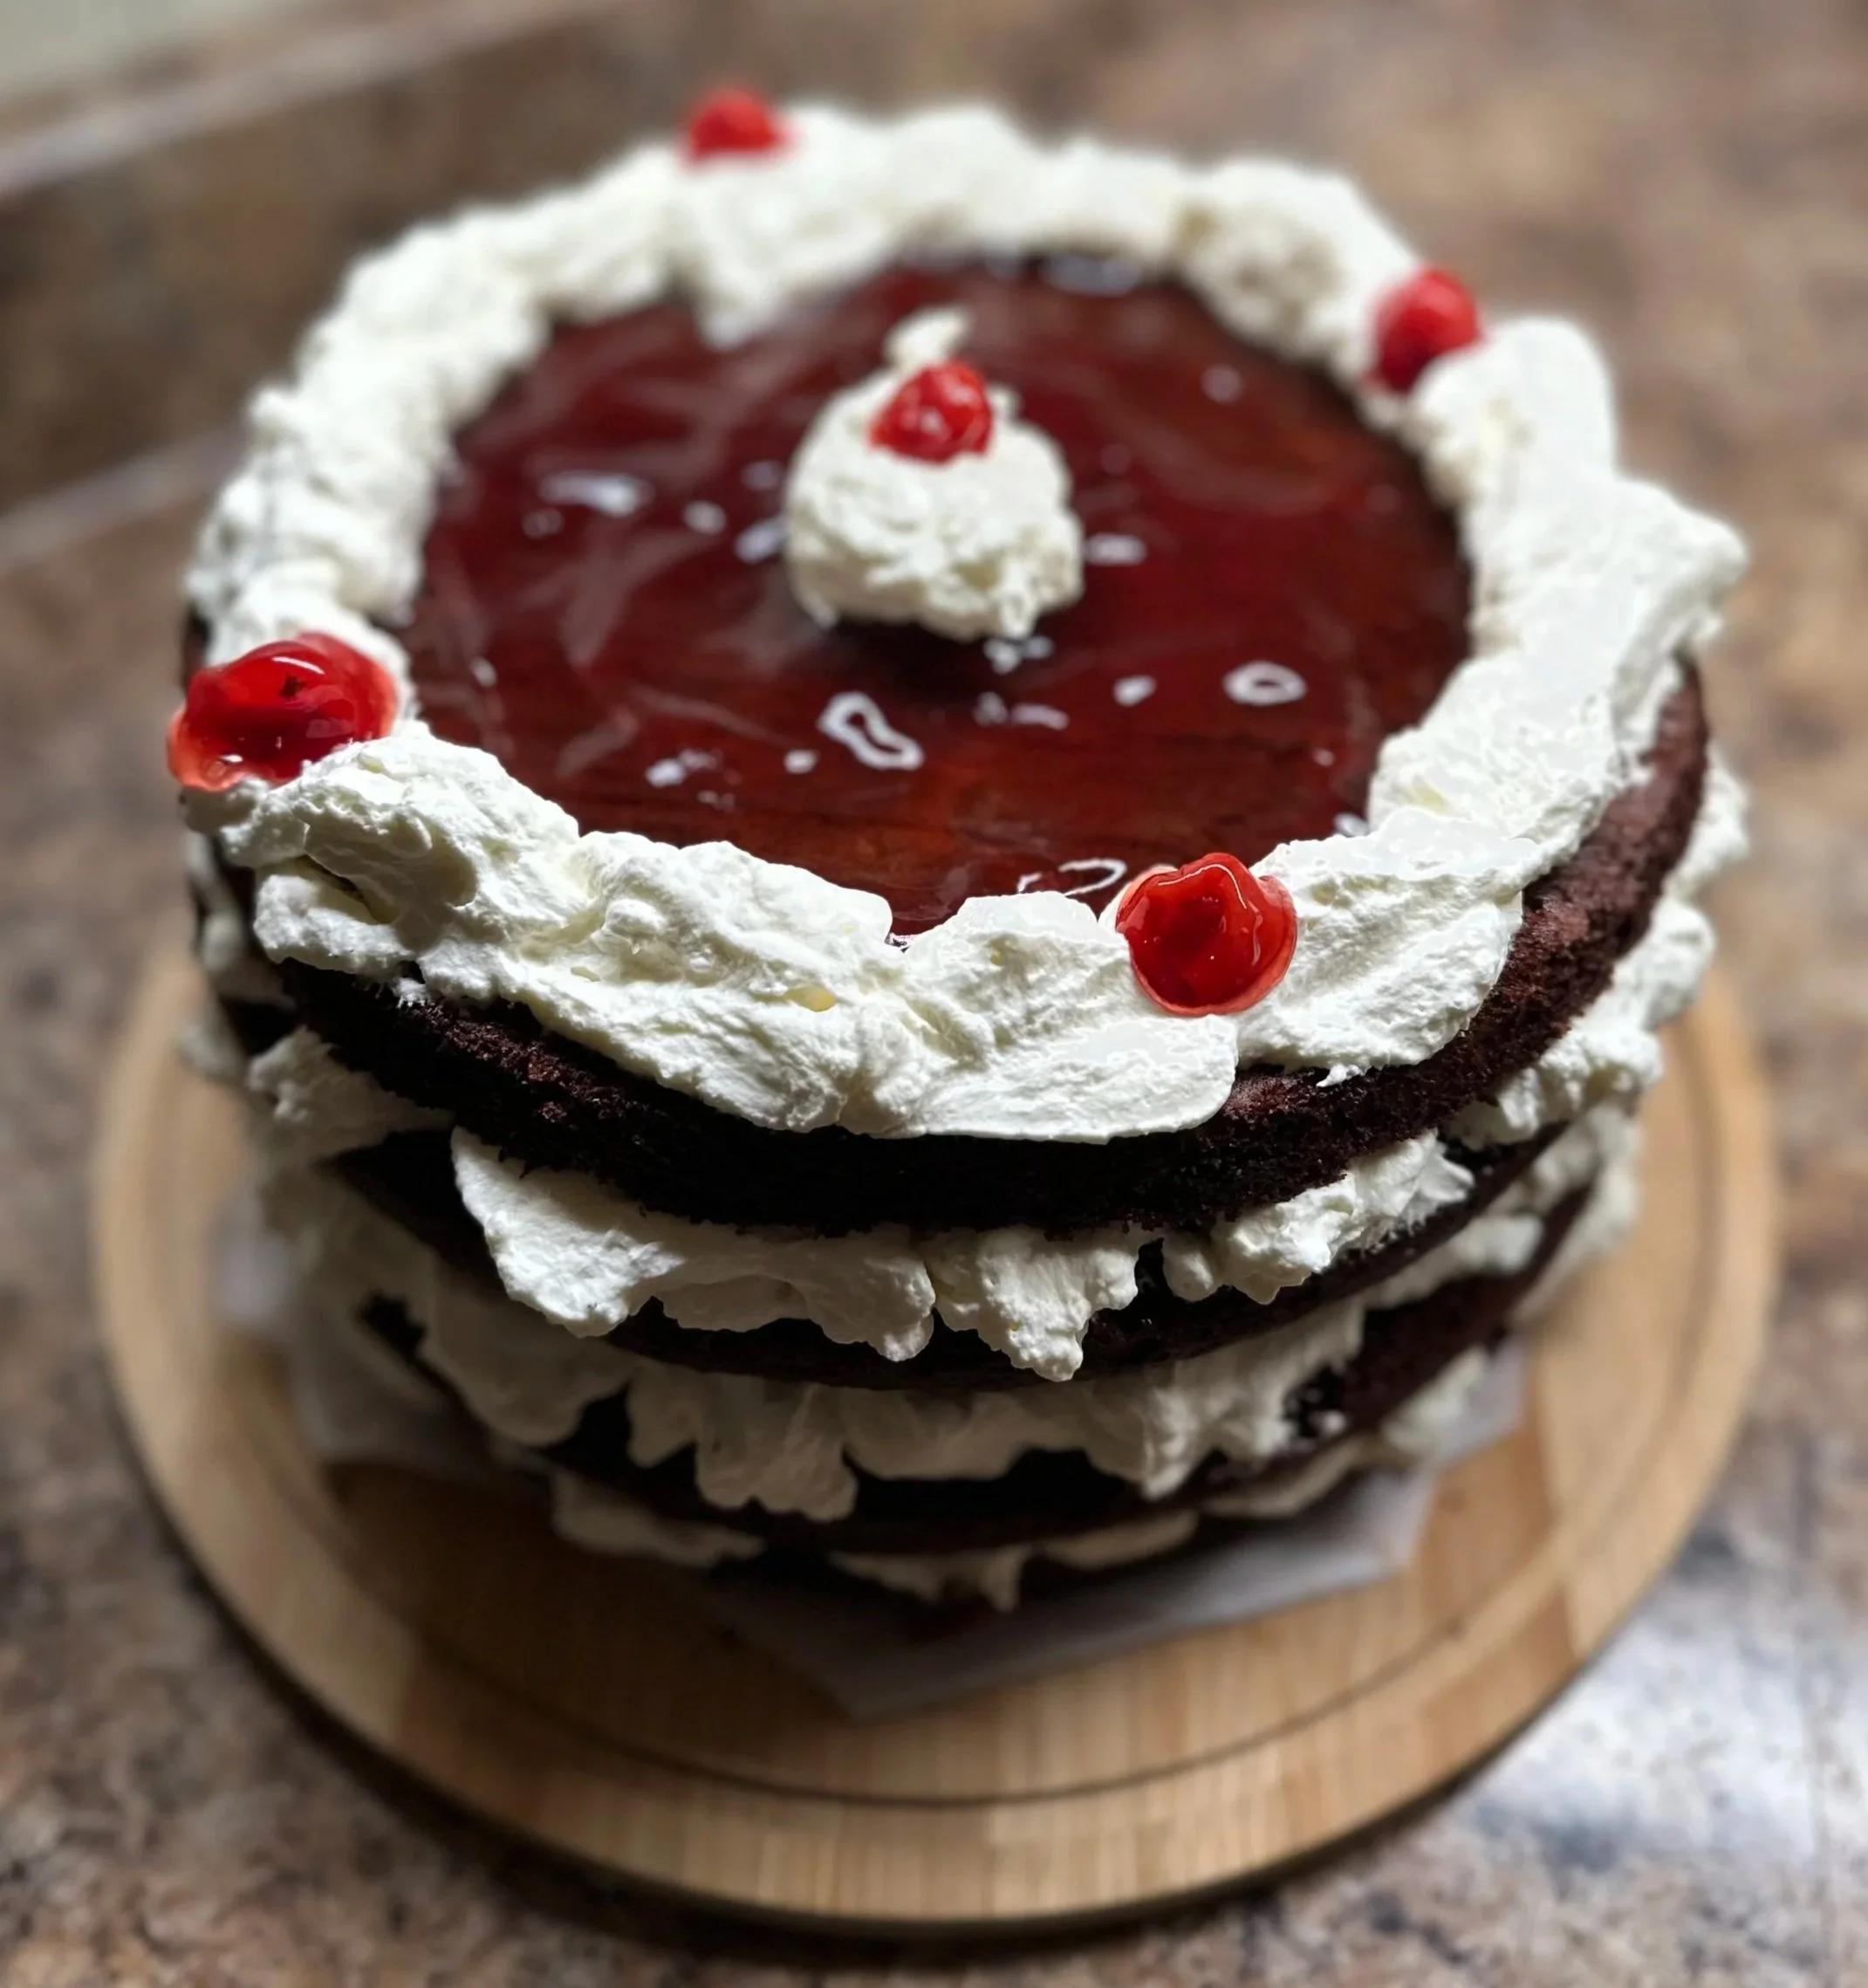
Black Forest Cake
Divine moist chocolate cake with a cherry filling and real whipped cream topping
Black Forest cake has been the birthday cake for as long as I can remember. Growing up, my mom would special‑order it from a little local bakery and it had to be that bakery. They were the only ones who used real whipped cream, the kind that’s soft and tastes like real cream, not the overly sweet icing or “whipped topping” imposters so many conventional bakeries used. One bite and you knew: this was a cake made with care. The cream melted instantly, the cherries were bright and juicy, and your fork would go through the chocolate layers with the slightest pressure.
Fast forward to today, and finding a bakery that still makes the real deal feels almost impossible. So, as any “master baker in progress” would do, I finally decided it was time to make my own Black Forest birthday cake. And honestly? It felt like reclaiming a tradition.. the scent of cocoa warming the kitchen, the soft rustle of parchment as the cakes release from their pans, the moment the cherry syrup sinks into the cooled layers. It’s a whole sensory experience that brings me right back to childhood.
A Quick Tip for Cake Success
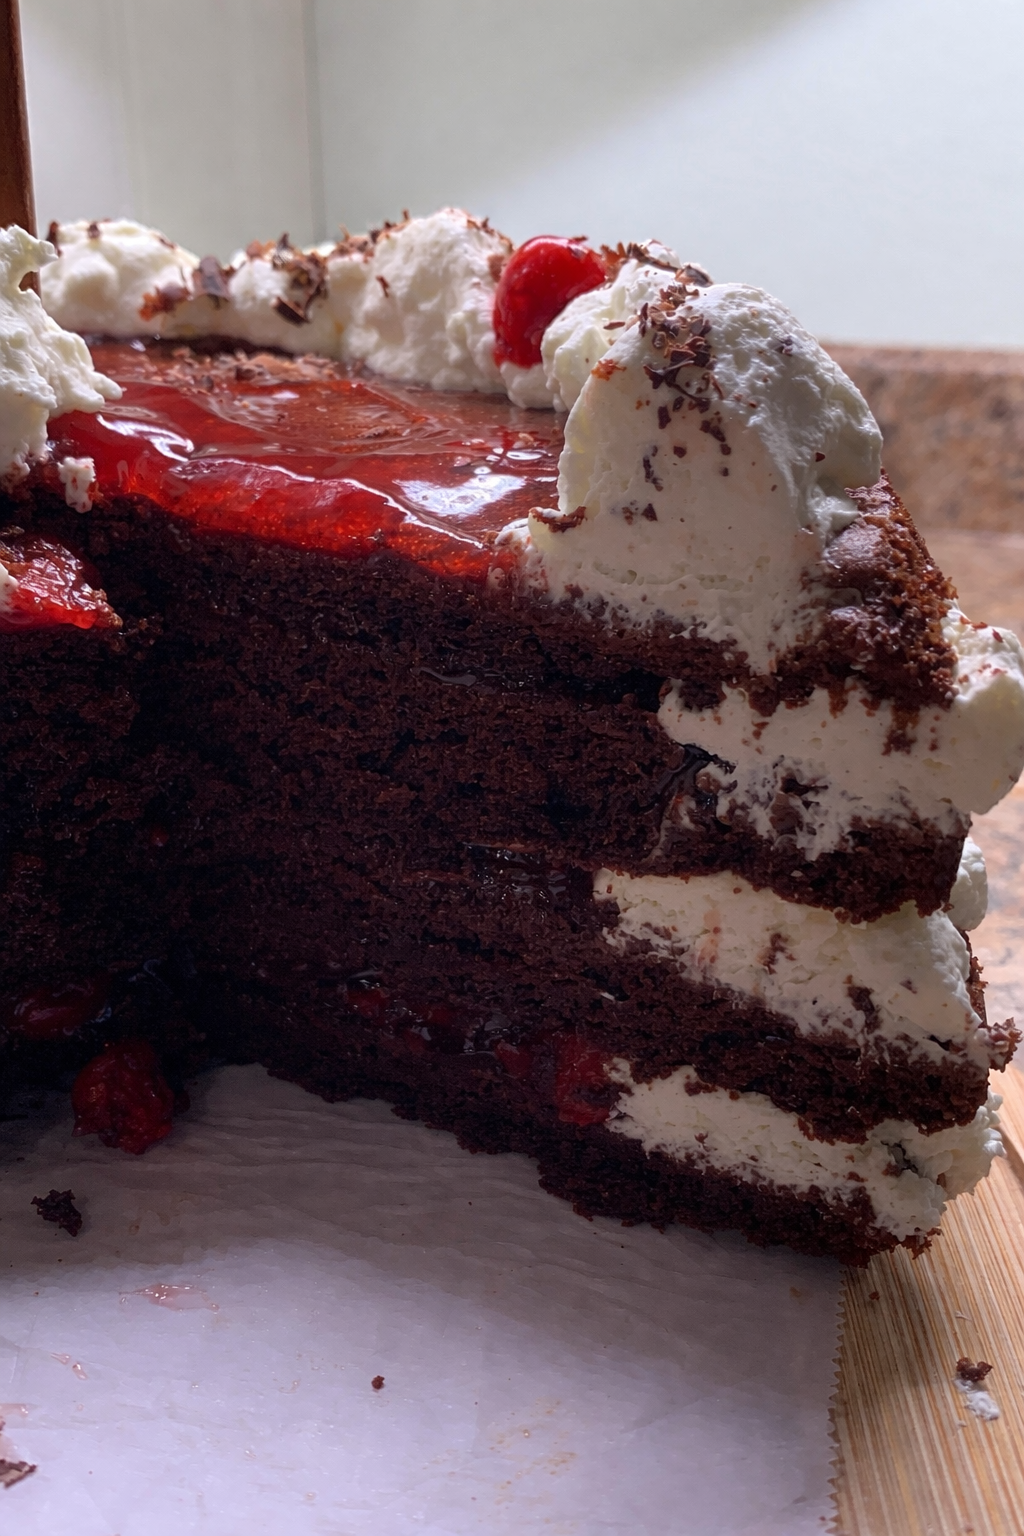
If you want those beautiful, thin, even layers, patience is your best friend. Let the cakes cool completely before slicing them in half. I baked mine in the morning and didn’t touch them again until they were fully cooled. The layers held together perfectly and didn’t crumble when cutting. The payoff is worth it: four delicate layers ready to soak up cherry juice and cradle generous swirls of whipped cream.
A Baking Tip
For the softest crumb and the smoothest batter, make sure your eggs, sour cream, and milk are at room temperature before mixing. When these ingredients aren’t cold, they incorporate more easily into the batter, creating a silky texture and a cake that bakes up tender and even. It’s a tiny step that makes a noticeable difference.
This Black Forest Cake is officially saved to my favourite‑cakes list, and I hope it becomes a special tradition for you too. The soft chocolate crumb, the bright cherries, the cool whipped cream..it all comes together in a way that feels both nostalgic and celebratory.
Black Forest Cake
Ingredients
Chocolate Cake:
2 cups brown sugar
1 and 3/4 cups all‑purpose flour
1 cup unsweetened cocoa powder (not Dutch‑processed)
2 teaspoons baking soda
1 teaspoon baking powder
3/4 teaspoon salt
2 large eggs (room temperature)
1 large egg yolk (room temperature)
1 cup sour cream (room temperature)
1/4 cup whole milk (room temperature)
1/2 cup canola oil
1 tablespoon vanilla extract
1 cup freshly brewed strong coffee (hot)
Cherry Filling:
3 cups fresh or frozen cherries
2 teaspoons honey
2 teaspoons cornstarch
Directions:
Chocolate Cake
Preheat oven to 350°F. Generously grease two 9‑inch round baking pans with butter and set aside.
In the bowl of a stand mixer fitted with the paddle attachment, or in a large bowl using an electric mixer, combine the sugars, flour, cocoa, baking soda, baking powder, and salt on low until thoroughly combined. Set aside.
In a separate bowl, whisk together the eggs, yolk, sour cream, milk, oil, and vanilla until well combined.
Add the wet ingredients to the dry ingredients and mix on low speed until just incorporated. Carefully pour in the hot coffee and continue mixing until fully combined; about 1 minute. The batter will be thin.
Divide the batter evenly between the prepared pans.
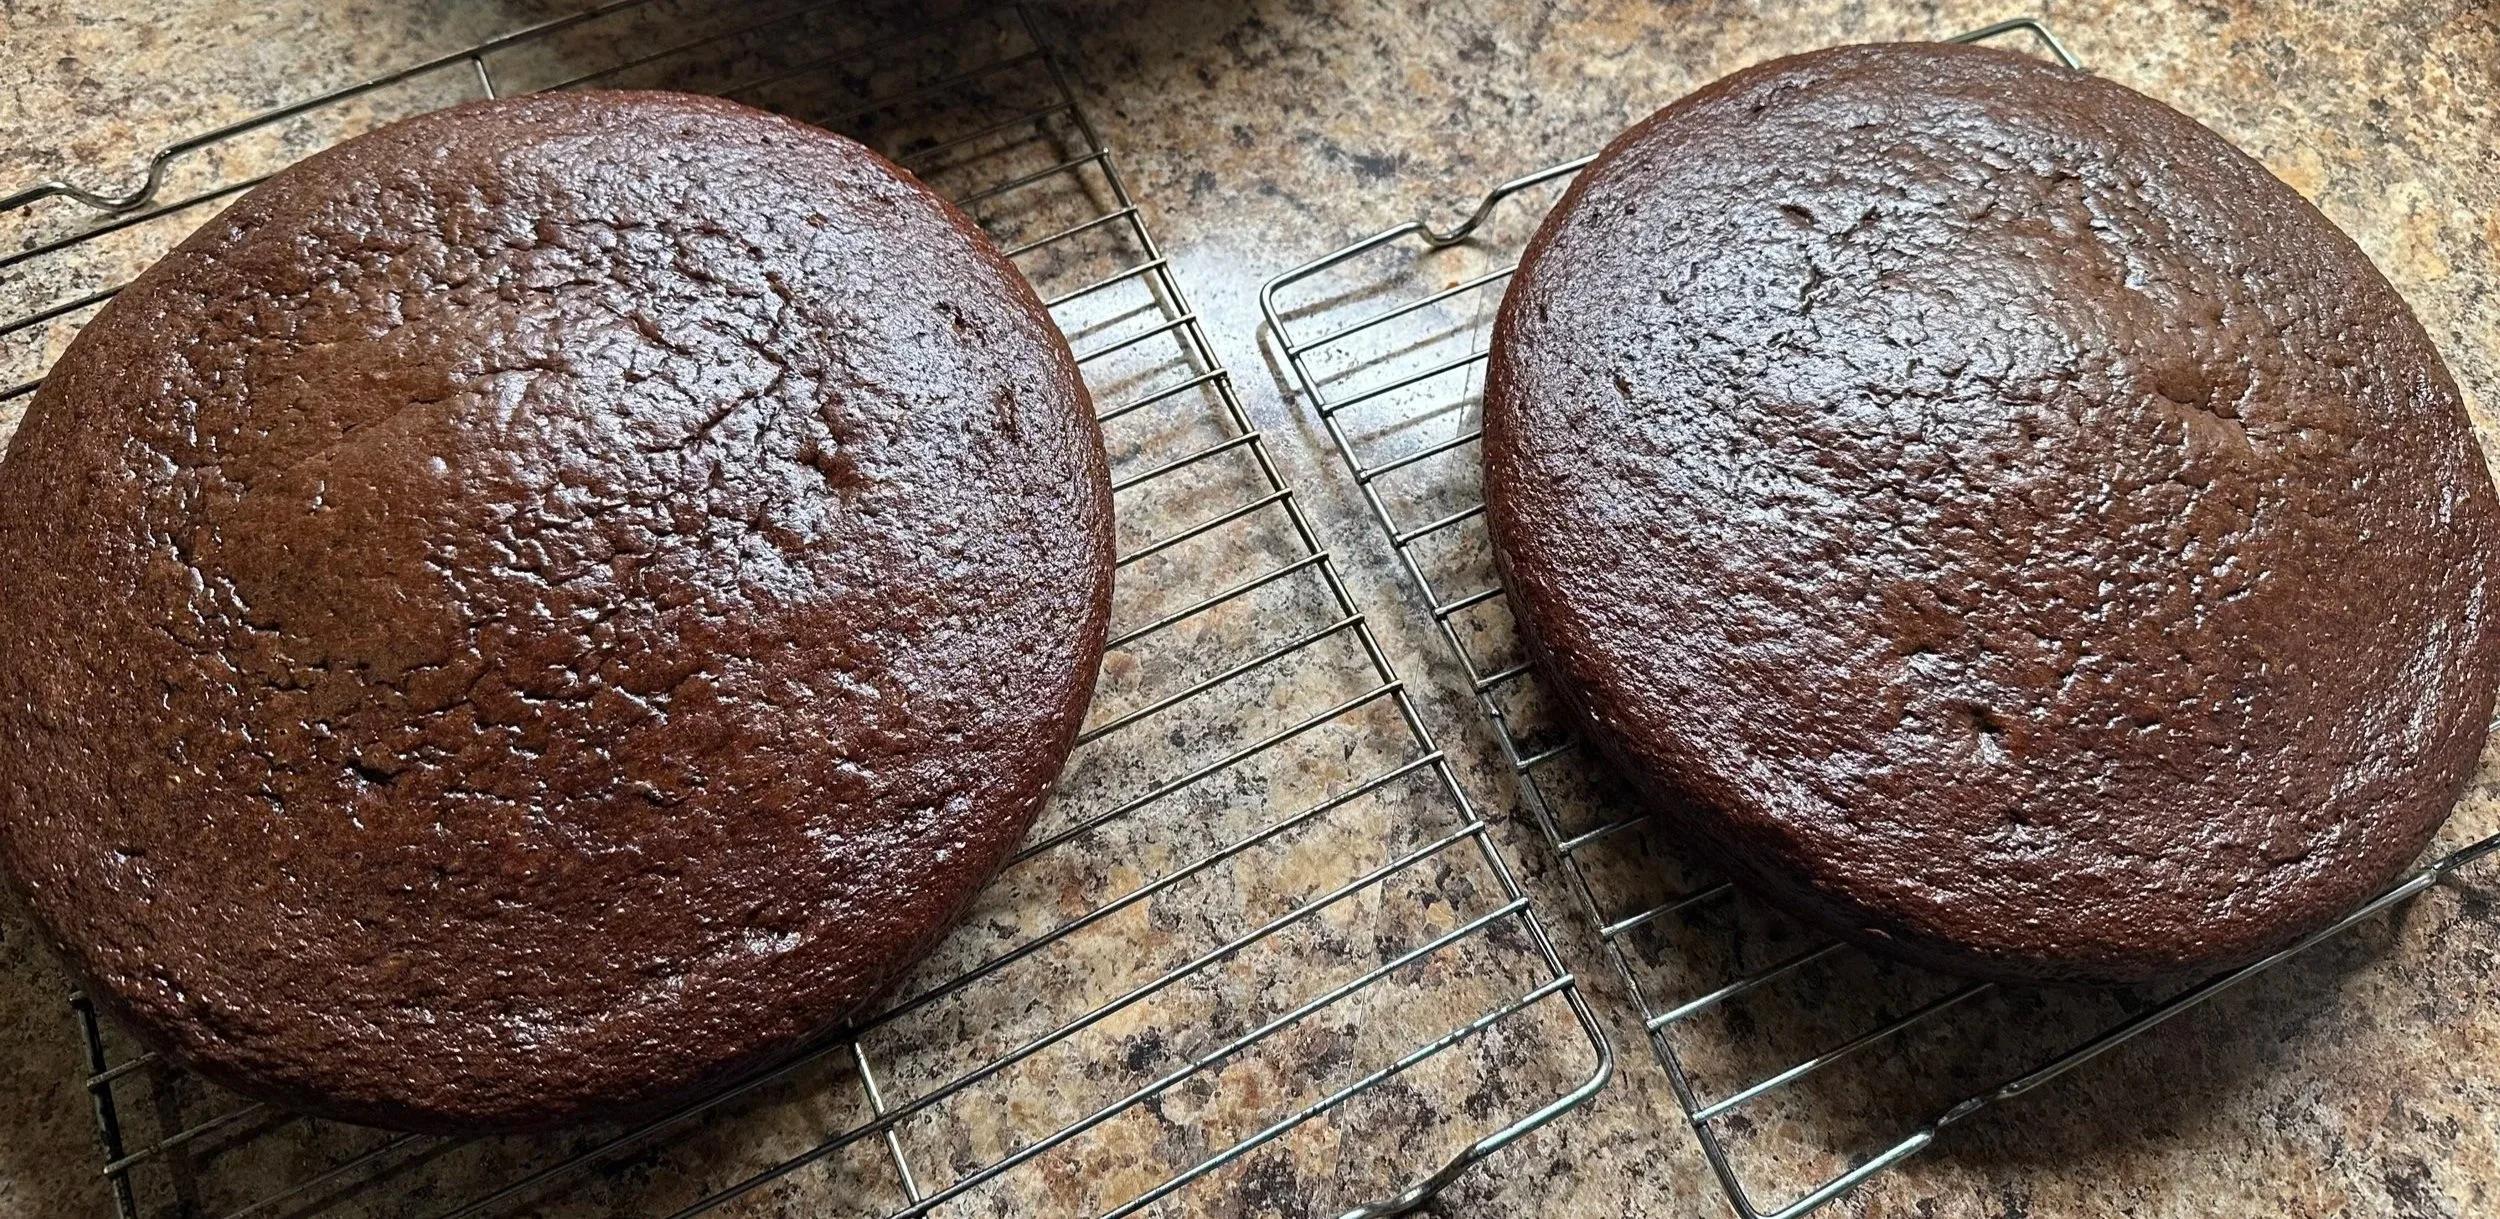
Bake for 30–35 minutes, or until a toothpick inserted into the centre comes out clean or with a few moist crumbs.
Cool the cakes in their pans for 10 minutes, then transfer to a cooling rack to cool completely.
Cherry Filling
Combine all ingredients in a saucepan over medium‑high heat. Simmer, stirring often, until the mixture thickens, about 6 minutes.
Reduce heat to low and cook for another 2 minutes. Transfer to a heatproof bowl and cool completely.
Whipped Cream Topping
In a large bowl using a handheld mixer, or in a stand mixer fitted with the whisk attachment, whip the cold heavy cream on medium speed until it begins to thicken. Add the vanilla paste and continue whipping, increasing to medium‑high, until stiff peaks form and the cream holds its shape.
Note: You truly don’t need added sugar in whipped cream. If you whip it long enough, it becomes naturally sweet, stable, and beautifully firm. Vanilla paste adds incredible flavour without the alcohol scent or taste found in many extracts.
Cake Assembly
Using a long serrated knife, carefully slice each cake in half once they are completely cooled. This gives you four even layers that won’t crumble or tear.
Place the first layer on your plate or cake stand, flat side down. Spoon a ring of whipped cream around the outer edge — this creates a little “wall” — then spread the cherry filling in the centre.
Add the second layer on top, placing it rounded side down into the cherry filling so the flat side faces up. Repeat the process: whipped cream around the edge, cherry filling in the middle.
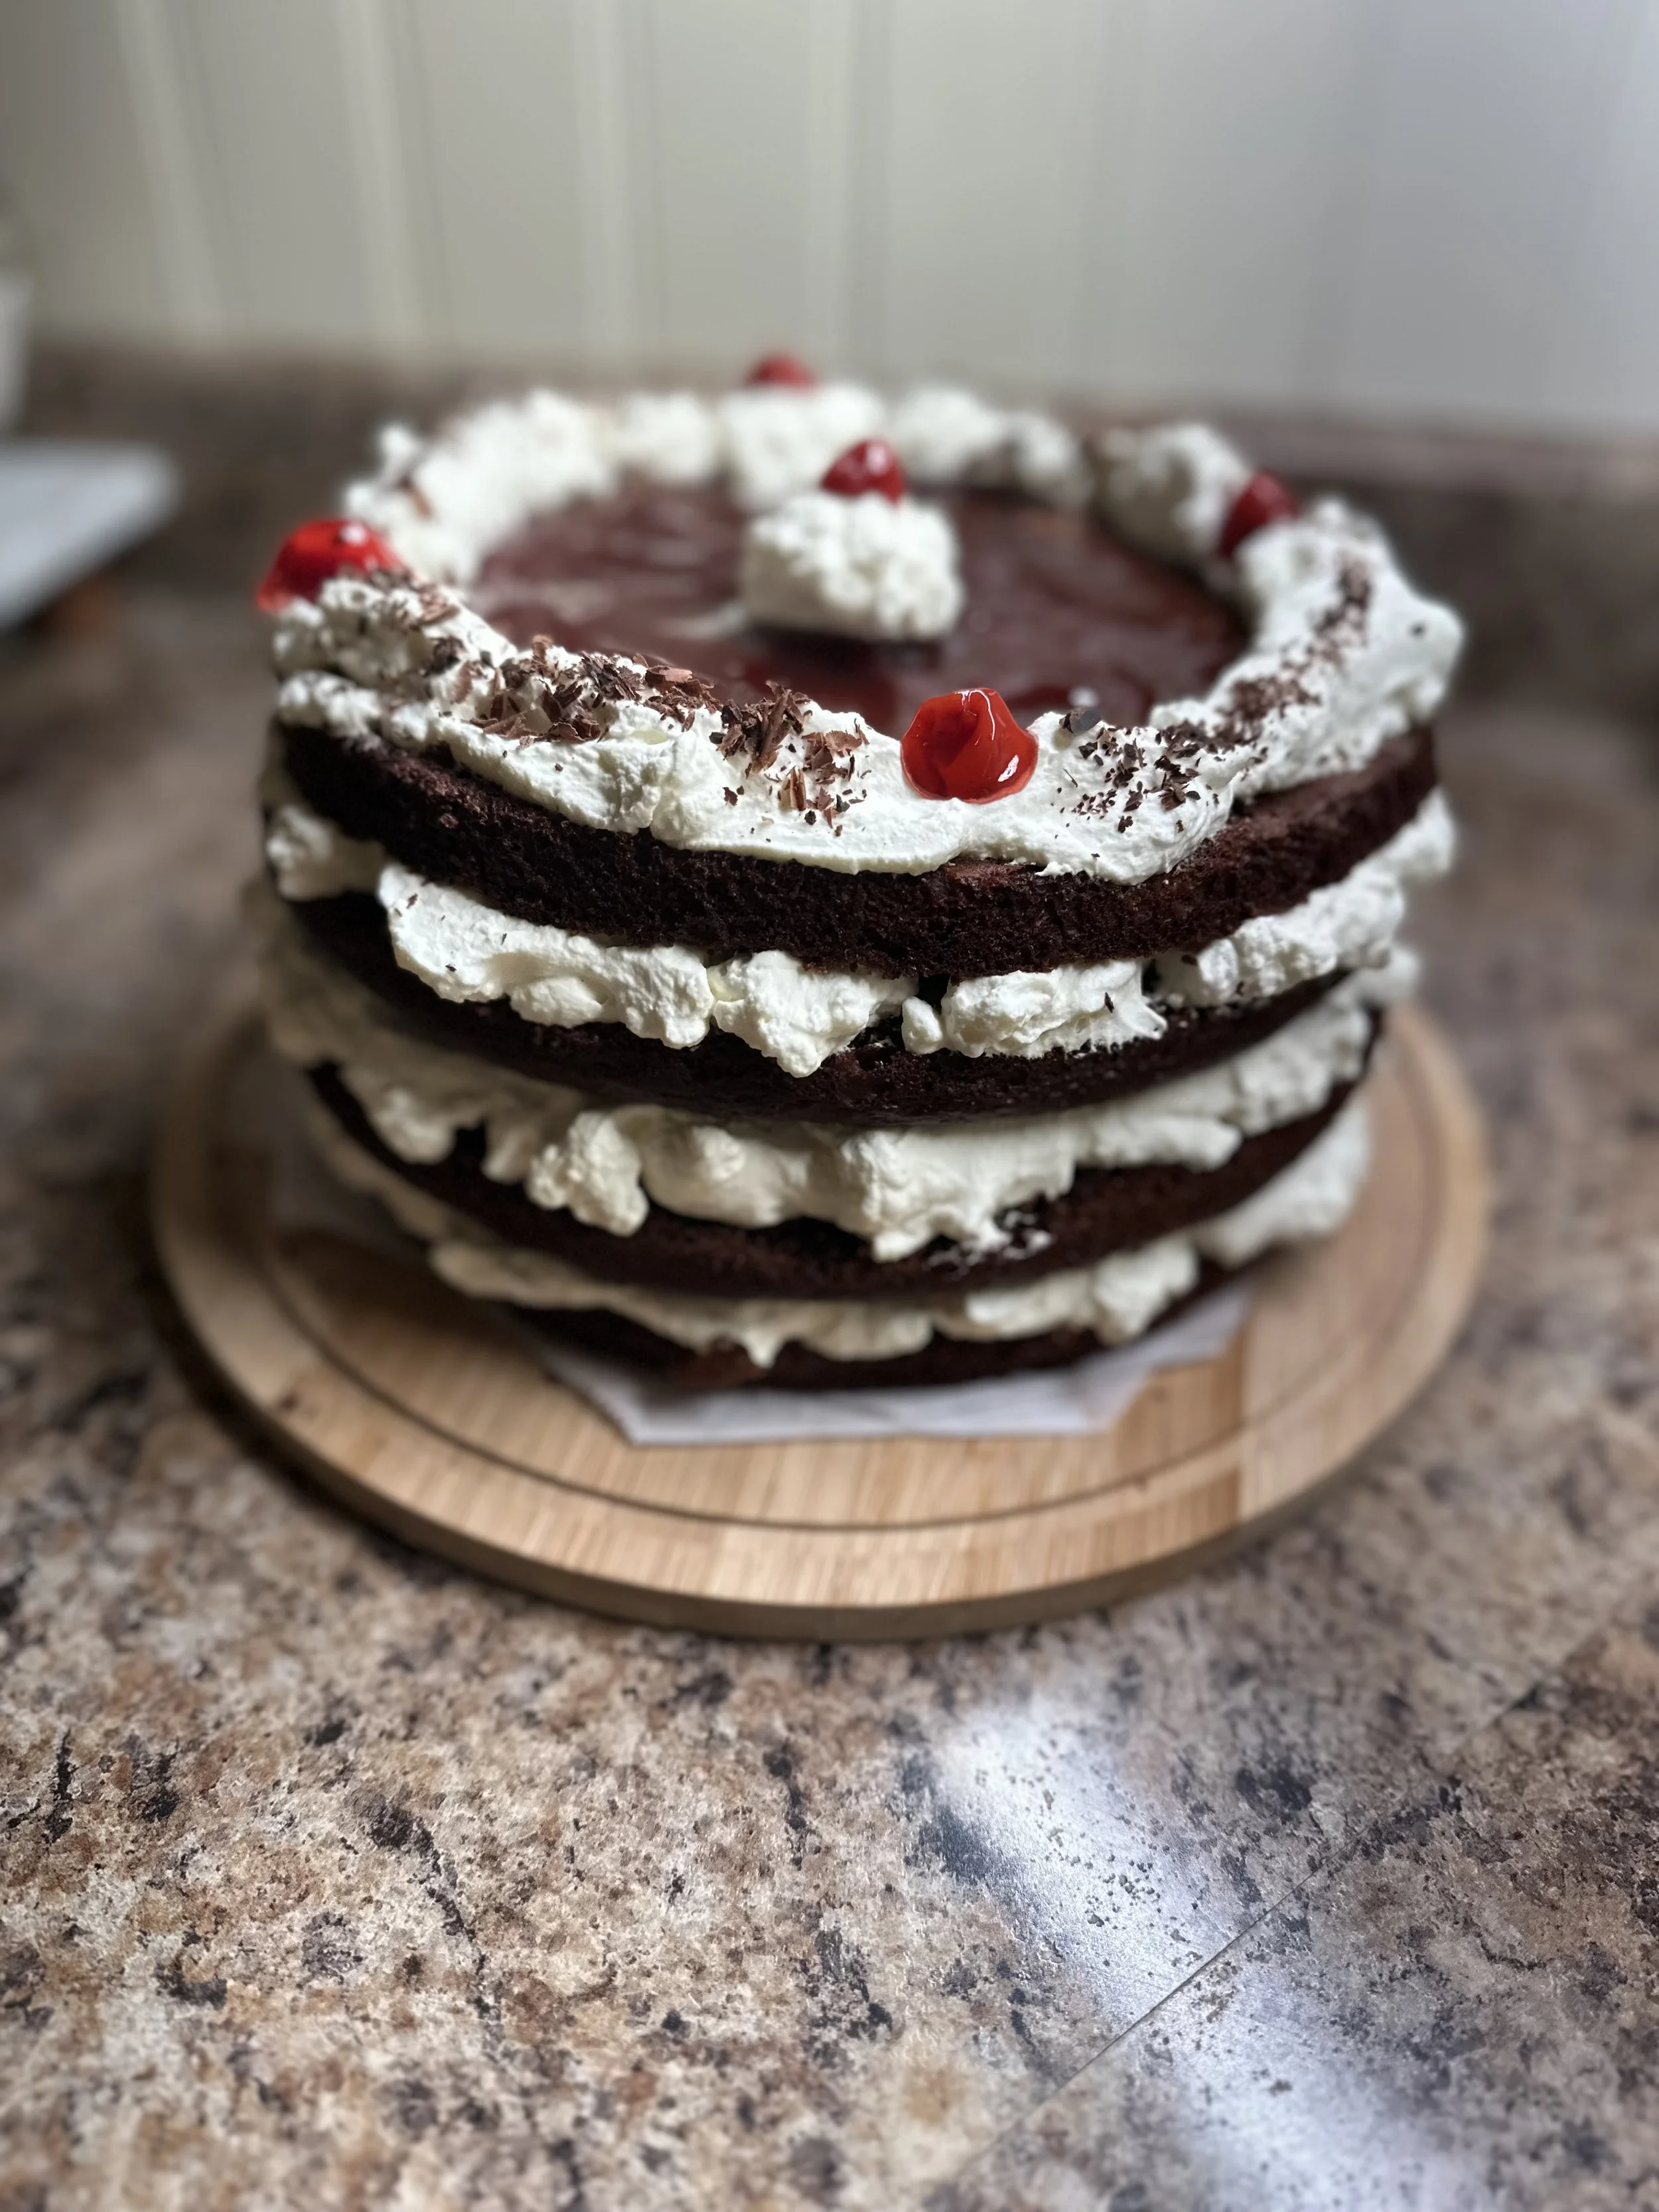
Continue layering until all four layers are stacked.
Finish with fresh cherries and chocolate shavings.
Refrigerate for about an hour to let everything set, then slice and enjoy.
What’s your favourite birthday cake? Share in the comments and keep the Growing Our Plate conversation going.
Happy baking!